Top 6 Secret Tricks To Boost Up your Slow Computer
Method 1: Using External USB (Ready Boost)
In this System booster method, you will have to use external Pendrive to speed up our computer. So, you have to use Pendrive or USB memory on your system as a RAM.
Steps to Boost Up Your system using Ready Boost Feature:-
- Insert USB or Pendrive in your PC port.
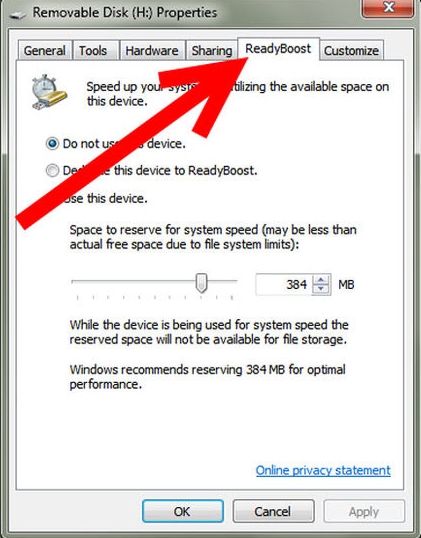
- Right, click on Pen Drive in Computer and open properties.
- Now select ReadyBoost button in properties.
- Check the “use this drive” radio button there.
- Now choose the memory that you want to allocate to the system for use.
- Now click apply the OK.
That’s it! now that USB will work as your external RAM.
Note: Your system will be boosted and it will be using your Pendrive as a RAM until you have inserted into your Computer.
Method 2: Using Memory Cleaner Batch File (System Booster)
In this method, you will have to create a program in batch coding which will automatically clean the memory whenever you run it on your desktop. This method is very helpful when your PC gets slow. Just double click on the file and your system will work correctly or get boosted.
Steps To Create A Memory Cleaner Batch File:-
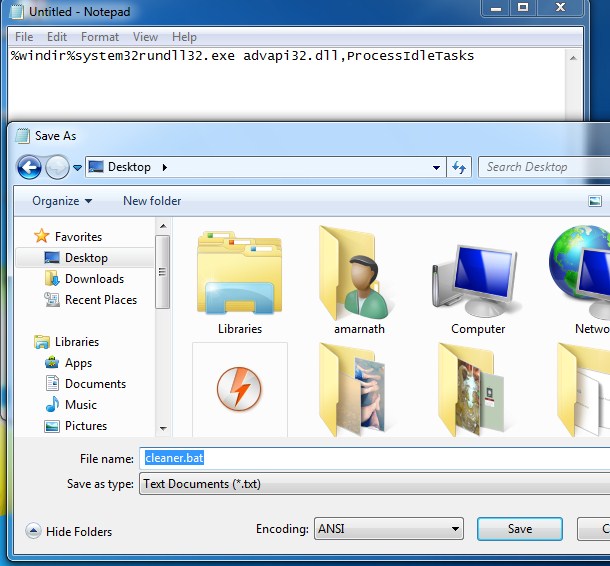
Step 1. Open notepad and paste the below code in it. “%windir%system32rundll32.exe advapi32.dll,ProcessIdleTasks” [without quotation mark].
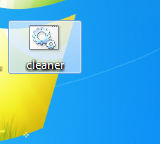
Step 2. Save the file as cleaner.bat in your desktop Now you will see a Cleaner batch file on your desktop. This file will run the system cleaner when you double click on it.
Method 3: Cleaning Temporary Files
In this method, you will have to clean temporary files in your computer.
Steps to Clean Temporary files in your system:-
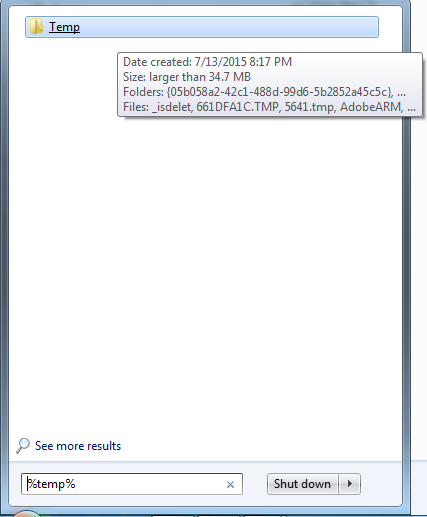
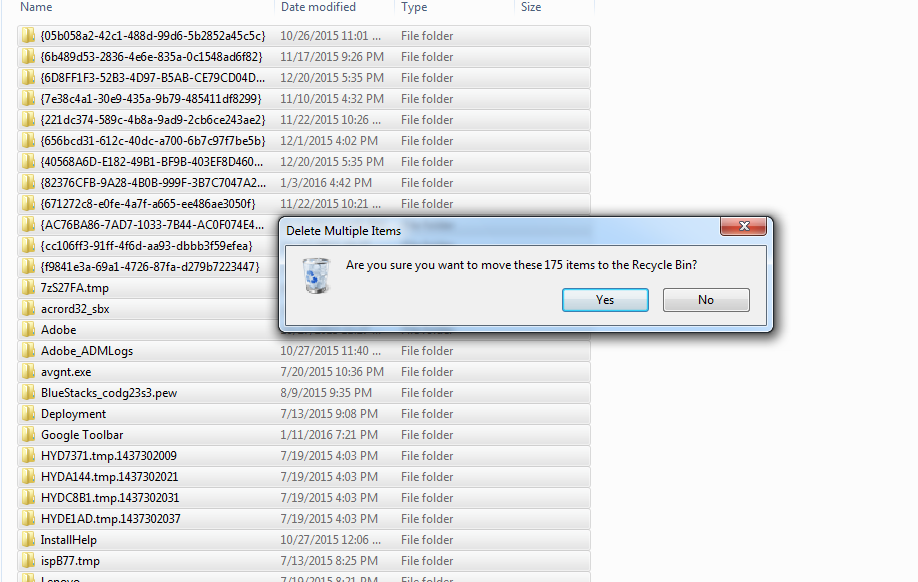
Step 1. Click start and type “%temp%” (without quotes) and press enter. Now a list of temporary files will open.
Step 2. Now press CTRL+A and then Del buttons of your keyboard. Now select yes.
By this, all your temporary files will be deleted and your system will get boosted.
Method 4: Putting a Brake on Windows Startup Services
In this method, you will have to use run command to stop loading unnecessary windows services to load during startup. This one will not only give your PC a fast startup moreover, it will also help your computer to run much faster.
Steps To Stop Unnecessary Windows Startup Services:-
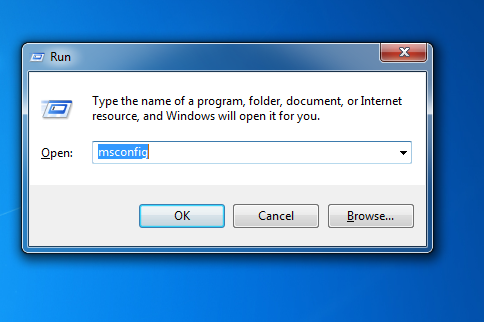
Step 1. Open Run Command by searching in your Computer’s Start Menu. Or you can simply press Windows key+R at a time to open RUN Command. Type “Msconfig” and hit enter.
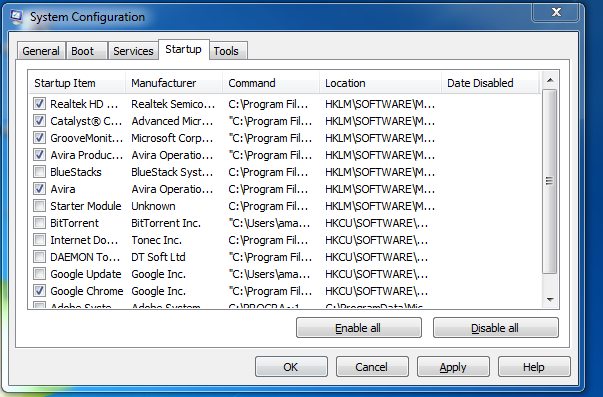
Step 2. Now Browse to Startup tab, And unselect all that you feel are unnecessary to load at your Windows Startup and click on Ok. It will ask you to restart your computer to make changes. Reboot it and you will see a fast startup with increased computer speed.
Method 5. Using Task manager
You can have a brief look at your Windows Task Manager in order to know which program is actually taking too much of Networking and Memory. We usually ignore this important feature which comes pre-loaded in your windows. You can stop the processes consuming more RAM and can make your computer run faster than before.
Steps To Close Programs Using Task Manager
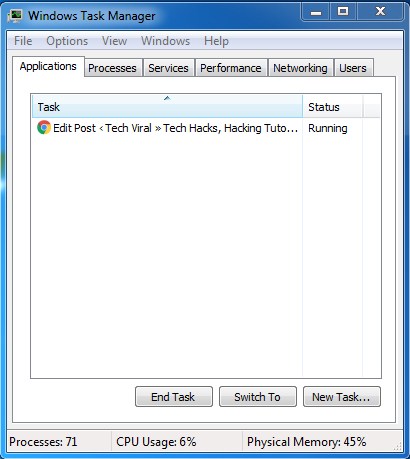
Step 1. Press [Ctrl]+[Alt]+[Del] to bring up the Windows Security screen. Which will provide you five options, you need to click on Task Manager.
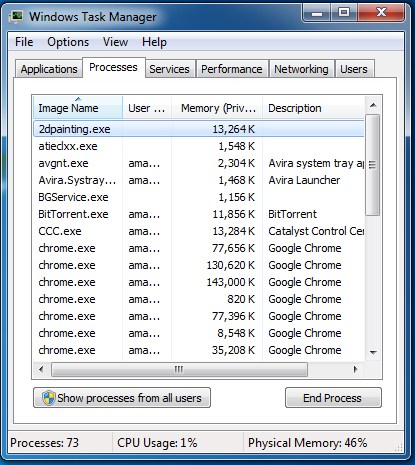
Step 2. Once you select Task Manager it will show you all Running applications under “Application” Tab. You need to select the “Processes” tab which is located just beside Application tab. You will see all the running process there and also the amount of memory they are consuming.
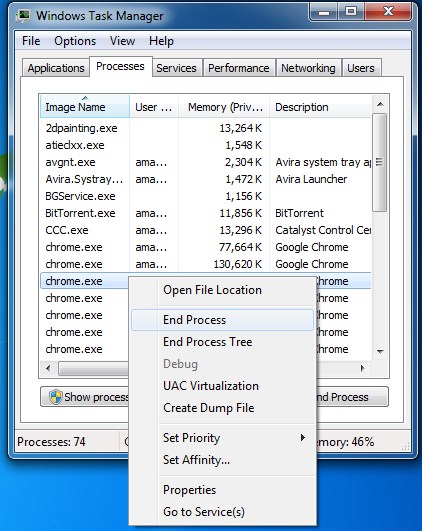
Step 3. You need to look for the processes which are taking lots of memory, right-click on it and click on “End Process”.
That’s it! you can end processes that are consuming a lot of memory which can boost up your system’s speed in no time.
Method 6: Reducing Animations
Well, it goes without saying that Windows 10 boats lots of animations. These animations actually improve the look of our Windows 10 computer. However, at the same time, it makes our computer to slow down. You can always minimize and maximize the Windows animation instantly.
How To Reduce Windows Animations:
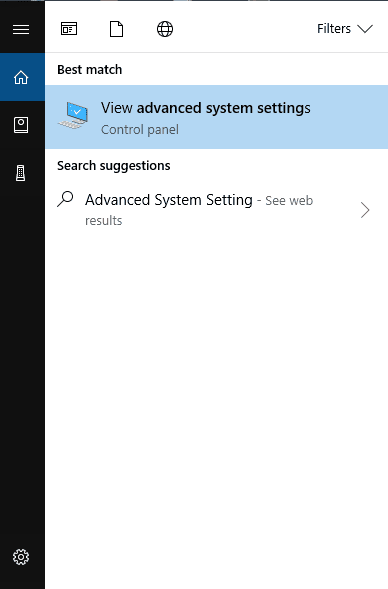
Step 1. First of all, open the start menu and there search for Advanced System Settings. Click on it to continue.
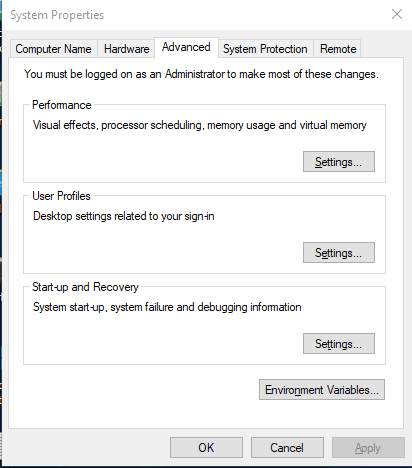
Step 2. Now under the SYSTEM PROPERTIES, you need to click on “Settings” under the Performance.
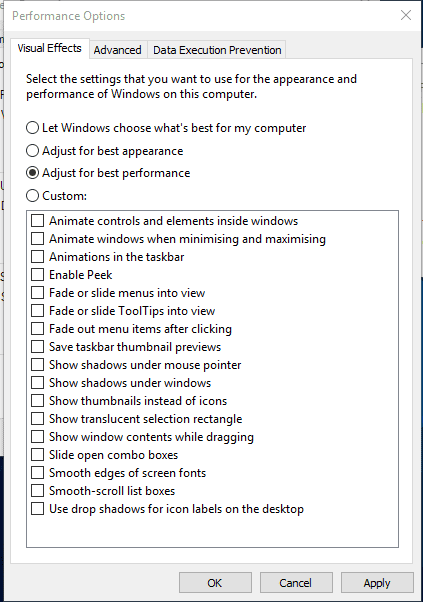
Step 3. Now under the Performance tab, you need to choose the option “Adjust for best performance” under Visual Effects to disable all the animations.
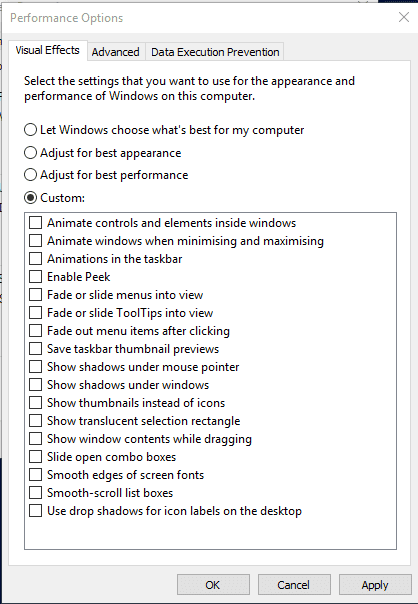
Step 4. If you want to disable any individual animations of your own, then you need to choose the option “Custom”
That’s it, you are done! This is how you can disable or reduce the amount of animation from your Windows computer. You can alter various animation options by going through the “Custom” option under the Animation section.
0 comments:
Post a Comment